Adventure slide show by 5/11/2023
Overview | Juniper Peak Summit Base Exploration, Red Rock Canyon National Conservation Area, Nevada
This is a streamlined course description from The Arnight Trailhead in Oak Creek Canyon to Juniper Canyon base, through Juniper Canyon to the canyon summit and finally exploring some summit routes along the base of Brownstone Wall below Juniper Peak Summit. This stretch along the base of Brownstone Wall has multiple routes. Once at the summit of Brownstone Wall Base, the route is more defined as it makes a sharp turn up the Juniper Peak final summit approach.
Features of This Streamlined Route to Brownstone Wall:
- Juniper Canyon from Arnight Trail: Discover exactly where to turn left (West) off the Arnight Trail, to The Juniper Canyon Landmark Boulder and on to the narrow entrance of Juniper Canyon
- Find Juniper Canyon Boulder Stretch: Find the beginning of the boulder route through Juniper Canyon instead of missing the canyon opening
- Navigate to Upper Juniper Canyon: Navigate the boulder route and red rock ridge to upper Juniper Canyon
- Sandstone Above Juniper Canyon: Ascend to the white sandstone stretch above Juniper Canyon
- Brownstone Wall Base: Explore some routes along the base of Brownstone Wall
Additional Juniper Peak Articles
Rather than head straight to Juniper Peak summit via the traditional route, I’m taking my time to explore, refine and describe every stage along the way. This article gives the most streamlined approach to and through Juniper Canyon to the canyon summit where the white sandstone stretch begins. Then, I explore the area above the white sandstone where there are numerous routes. Some of the routes are rock climber approach routes for scaling Brownstone Wall.
The traditional Juniper Peak Summit route along the white sandstone involves some dramatic exposure. I’m exploring routes along the base of Brownstone Wall with a goal of piecing together a route to Juniper Peak summit that has the least exposure.
Incredible Views Along the Way
There are spectacular views of Red Rock Canyon and its surroundings while approaching and ascending the base of Juniper Canyon. Included are the Rainbow Mountains from North to South (Monument Peak, Indecision Peak, Mt. Wilson, Rainbow Mountain, Juniper Peak, Bridge Mountain); White Rock Mountain, The La Madre Mountains Cliffs, Turtlehead Peak, Damsel Peak, The Calico Hills, a portion of The Las Vegas Valley, Blue Diamond Hill and areas beyond.
Best Time of Year for This Adventure
Stick to Mid Fall and Mid Spring. Winter can bring icy conditions to the upper elevations and Summer can bring heat in excess of 110 degrees!
Trailhead Directions | Juniper Peak Summit Base Exploration, Red Rock Canyon National Conservation Area, Nevada
There are 2 trailheads in Red Rock Canyon that are closest to Juniper Peak:
- Pine Creek Canyon Trailhead, the second to the last turn-off on the Red Rock Canyon Scenic Drive Loop.
- Oak Creek Canyon Trailhead the last turn-off on the Red Rock Canyon Scenic Drive Loop.
Adventure Description | Juniper Peak Summit Base Exploration, Red Rock Canyon National Conservation Area, Nevada
Scenic Drive to The Oak Creek Canyon Trailhead
This adventure begins at the intersection of The Red Rock Canyon Scenic Drive and Oak Creek Canyon Road. From that intersection head up Oak Creek Canyon Road for about a half mile to The Oak Creek Canyon Trailhead. That trailhead has good parking for about 15 vehicles and is seldom full. There is also a primitive restroom facility there.
At The Oak Creek Canyon Trailhead you have 2 choices:
- The Oak Creek Canyon Trail: This continues straight toward the Rainbow Mountains and leads to the wild Oak Creek Canyon between Mt. Wilson to the South and Rainbow Mountain to the North. It will not take you to Juniper Canyon and Juniper Peak.
- The Arnight Trail: This heads off to the North (right) and leads to Juniper Canyon and Juniper Peak.
Note that Oak Creek Canyon is more difficult to navigate than Juniper Canyon. For the best Rainbow Mountains canyon experiences, develop your canyon navigation skills by first navigating Lost Creek Canyon, then Ice Box Canyon, then you’re ready for Pine Creek Canyon and Oak Creek Canyon. By the time you finally get to First Creek Canyon, you’ll be ready for that canyon too.
Arnight Trail to the Base of Juniper Canyon
So, back to the Arnight Trail. The Arnight Trail is only 1.2 miles and angles from The Oak Creek Canyon Trailhead toward Juniper Canyon and, in my thinking, feels like the most direct route to Juniper Canyon. In the morning, the sun is at a perfect angle to get the best pictures of The Rainbow Mountains while you’re on The Arnight Trail heading toward Juniper Canyon. In addition, on the return trip when you’re tired, it’s downhill all the way. You could also navigate to Juniper Canyon from The Pine Creek Canyon Trailhead, but I prefer The Oak Creek Canyon Trailhead and the Arnight Trail.
From The Arnight Trail to The Juniper Canyon Landmark Boulder
Now, the question is where to turn left off The Arnight Trail to begin heading up Juniper Canyon. You want to take this left turn before the Arnight Trail intersects with the Knoll Trail. At the point where The Arnight Trail crosses Juniper Canyon, Juniper Canyon is rather wide, and there are multiple left turns off The Arnight Trail into Juniper Canyon. Realize that you want to head up the North (right) side of Juniper Canyon along the main Juniper Canyon approach trail. This means that you’re going to continue crossing Juniper Canyon until you’re almost on the North side of the canyon.
Here’s how to find the exact (unmarked) spot to turn left up Juniper Canyon: Where you arrive at the first line of vegetation (Juniper trees of course.) lining the South edge of Juniper Canyon, there is an Arnight Trail marker. Counting that marker, continue on The Arnight Trail to the 5th Arnight Trail marker. At that marker you’ll see a faint trail heading to the left up the canyon. Take that left turn. There are a few more turns. Think, like the military, “left-right-left”. Those are the turns you take in that order from that Arnight Trail marker.
Once you take the final left turn, you’ll soon see a huge boulder ahead and to your right. This is the boulder I call “The Juniper Canyon Landmark Boulder”. It’s very distinctive and can be clearly seen from higher in Juniper Canyon and even from The Rainbow Mountain cliff base. When you eventually want to return by the unmarked routes to The Arnight Trail, The Juniper Canyon Landmark Boulder will be your guide.
Squeeze Through The Juniper Canyon Landmark Boulder to the North Side of Juniper Canyon
Continue toward The Juniper Canyon Landmark Boulder and squeeze through a narrow passage on its upper end (left side). There’s just enough room, unless you have a huge backpack! After squeezing through the upper end The Juniper Canyon Landmark Boulder, head up for about 50ft to the North side of Juniper Canyon where you will connect with the main Juniper Canyon/Juniper Peak approach trail. It’s a pretty distinctive trail. Take a left and begin heading up the North side of Juniper Canyon. The trail will continue above the base of the canyon avoiding the brush and boulders below.
Locating The Narrow Entrance and Boulder Section of Juniper Canyon
Now your challenge is to determine when to head down into the canyon, because you will eventually need to navigate through the narrow opening in the base of the canyon. The strategy is to stay on the North side of the canyon above the base of the canyon as long as possible. There may be cairns on the trail helping guide your way, maybe not! Just keep your sights on the narrow opening of the canyon ahead and avoid heading up toward the cliffs on your right (the are a few popular rock climbing approach trails heading in that direction); avoid heading across Juniper Canyon to the South side along a very good popular rock climbing approach trail to the Eastern cliffs of Rainbow Mountain; and avoid descending into the base of Juniper canyon too soon where you will face boulders and thick brush you can avoid. There are many unmarked trails in all directions that look inviting. Keep your sights on the narrow canyon opening ahead and navigate just above the canyon on the North side.
Eventually, as you’re almost at that narrow opening to Juniper Canyon, your trail above the canyon will give out, and you must descend into the base of the canyon (angling left). You’ll begin by passing through a tunnel of thick brush. After about 50 feet you will reach the boulders at the base of the canyon. There’s a cairn there. Do not descent further into the canyon, though that route looks easier. It leads to more difficult terrain. Instead, immediately ascend the large boulders above the cairn.
Navigating the Boulder Section of Juniper Canyon
Once above those initial boulders, look around for the next cairn. Cairns will guide your way. Just take time to always pick out the next cairn ahead and take the most natural route to that cairn. This is how to navigate the boulder section in the canyon. It seems long, but is probably less than a quarter mile.
As you ascend the boulder section, you’re ascending a series of boulder ledges (all fairly easy class 2-3). I find the following helpful for this section:
- Neoprene Knee Braces: These give added stability, and avoid crawling on bare knees in a few brief stretches.
- Rock Climbing Shoes: These give you the traction of Spider Man.
- Prior Regular Physical Conditioning: I run 5-miles/day and do daily stretches and about 60 pushups for upper body conditioning. This gives leg strength (you want to use the big muscles of your legs to ascend, rather than pulling yourself up with your arms) and upper body strength for when you need to lift yourself upward.
Navigating the Red Rock Bypass Ridge Above the Boulder Section
At the summit of the boulder section, you’ll arrive at a ridge composed of loose red rock. This high ridge bypasses very difficult brush, boulders and ledges in the canyon below to the right (North). The ridge is a good climb, but the trail is distinct. Just keep to your right avoiding a number of unmarked trails splitting off to the left. And, watch your step. It’s easy to slip on the loose rock…its a bit of an avalanche slope, but not too difficult.
Crossing to the North Side of Juniper Canyon and Ascending the Red Rock Boulder Field
Eventually you will reach the ridge summit where you will find — believe it or not — one of the best trails you’ve traversed so far today! You can also see from this point a large red rock boulder field ahead on the opposite (North side of the canyon). The great trail is only about 300 feet. Watch for a cairn on your right marking the point where you need to cross to the North side of the canyon where you will locate the base of that red rock boulder field.
You only travel a couple hundred feet in the base of the canyon before reaching a path through the brush on your right leading upward into the red rock boulder field. Ascend the boulder field following a route marked by cairns. It won’t be too long before you emerge onto a white sandstone ledge which marks the next stage of your adventure. When you reach this ledge, you’re basically at the summit of Juniper Canyon.
Ascending the White Sandstone Ledge
Head for the first boulder on that ledge (there is a cairn to the right of the boulder). This is where I diverge from the cairns. If you pass to the right of the boulder, you’re facing a large exposed drop-off to your right. I like to avoid navigating along the edge of such an exposure.
Exploring Alternate Summit Routes Along the Base of Brownstone Wall
So, on this day I explored some less exposed but more complicated routes to the left and above the boulder. These are the routes that continue along the base of the cliff referred to as Brownstone Wall. Some of these routes are used by rock climbers who intend to scale those cliffs! The strategy here is to pick out a route that continues upward along the base of Brownstone Wall, avoiding exposure, and eventually reconnecting with the cairned Juniper Peak summit route.
Reconnecting with The Juniper Peak Summit Route – No Significant Exposure
I succeeded on this day navigating through boulders and brush to reconnect with the cairned Juniper Peak summit route. However, by that point I had eaten up a good portion of time testing out a number of alternate unmarked trails along the base of Brownstone Wall. I will much more quickly and easily return to the point where the less exposed upper route meets up with the main summit route.
High Point Near the Final Summit Approach
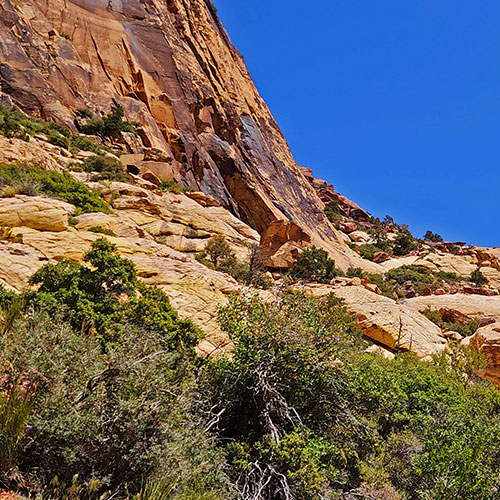
On this day I had reached a high point only about 300 feet from the left turn around the North end of Brownstone Wall which is the beginning of the final summit approach! The first slide on this page was taken at the point, and you can see the end of Brownstone Wall just ahead marking the final summit approach.
By the way, from this high point, the beginning of the sandstone ledge was far below, and the view went straight down Juniper Canyon all the way to the Oak Creek Canyon Trailhead. There are not many places where you can gaze for miles along your entire adventure route down to the very start point!
Route-Finding Strategy
My strategy is to discover routes myself, testing different approaches along the way. It takes me longer to reach a summit, but by the time I get there, I know a good part of the mountain in addition to the main summit approach route. This knowledge gives me lots of alternate routes to take if I should get off course on a future adventure. It also brings many more discoveries!


