Western Outer Circuit | Blue Diamond Hill, Nevada Blue Diamond Hill Viewed from Rainbow Mountains Upper Crest Ridgeline Western Outer Circuit | Blue Diamond Hill, Nevada East Toward Maverick Wind Sock Hill (Horizon) from Ridgeline's South High Point. Western Outer Circuit | Blue Diamond Hill, Nevada Blue Diamond Hill from the Northwest Just Beyond the Trailhead Western Outer Circuit | Blue Diamond Hill, Nevada Heading West Toward the Rainbow Mountains Western Outer Circuit | Blue Diamond Hill, Nevada View South. Ridgeline on the Right is West of Blue Diamond Hill Western Outer Circuit | Blue Diamond Hill, Nevada Ascended Here to the Center of the High Ridgeline West of Blue Diamond Hill Western Outer Circuit | Blue Diamond Hill, Nevada Found a Beautiful Trail on the High Ridgeline West of Blue Diamond Hill. Western Outer Circuit | Blue Diamond Hill, Nevada Rainbow Mt., Juniper Peak, Bridge Mt and White Rock Mt. in View. Western Outer Circuit | Blue Diamond Hill, Nevada Slide #1 Was Taken from High Ridge Behind Rainbow Mt. (right). Western Outer Circuit | Blue Diamond Hill, Nevada Mt. Wilson and Indecision Peak from Western High Ridge Western Outer Circuit | Blue Diamond Hill, Nevada View Back to Red Rock Canyon from High Ridgeline West of Blue Diamond Hill Western Outer Circuit | Blue Diamond Hill, Nevada Northern Rainbow Mountains & Red Rock Canyon from Western High Ridgeline Western Outer Circuit | Blue Diamond Hill, Nevada Southern Rainbow Mts. from High Ridgeline West of Blue Diamond Hill Western Outer Circuit | Blue Diamond Hill, Nevada Mt. Wilson, Rainbow Mt., Bridge Mt. and White Rock Mt. from High Ridgeline Western Outer Circuit | Blue Diamond Hill, Nevada Peace Symbol Throwback to the 60's May Have Been Created Back Then. Western Outer Circuit | Blue Diamond Hill, Nevada East Toward Maverick Wind Sock Hill (Horizon) from Ridgeline's South High Point. Western Outer Circuit | Blue Diamond Hill, Nevada Marker Placed on Ridgeline's Southern High Point Back in 1953. Western Outer Circuit | Blue Diamond Hill, Nevada Descending the Western Ridgeline's Southern High Point Western Outer Circuit | Blue Diamond Hill, Nevada Fossil Discoveries During the Ridgeline Descent Western Outer Circuit | Blue Diamond Hill, Nevada Fossil Discoveries During the Ridgeline Descent Western Outer Circuit | Blue Diamond Hill, Nevada Looks Like an Ancient Lake or Sea Bed. Possible 450 Million Years Old Western Outer Circuit | Blue Diamond Hill, Nevada More Fossil Shells. Quite a Concentration in These Boulders Western Outer Circuit | Blue Diamond Hill, Nevada Each of These Fossil Boulders Were Different Western Outer Circuit | Blue Diamond Hill, Nevada Looking Back to Western Ridgeline While Ascending Through Mining Operation Western Outer Circuit | Blue Diamond Hill, Nevada Maverick Windsock Hill is High Point to Left of Mining Mound Ahead Western Outer Circuit | Blue Diamond Hill, Nevada Closing In on Maverick Windsock Hill Western Outer Circuit | Blue Diamond Hill, Nevada Windsock Hill is the Best 360-Degree View on Blue Diamond Hill East Ridge Western Outer Circuit | Blue Diamond Hill, Nevada Arrival on Windsock Hill, Looking North Western Outer Circuit | Blue Diamond Hill, Nevada View Toward Rainbow Mts. Mt. Charleston Wilderness Now in View. Western Outer Circuit | Blue Diamond Hill, Nevada Zooming in on Mt. Charleston Wilderness. Griffith Peak (left) to Mummy Mt. (right) Western Outer Circuit | Blue Diamond Hill, Nevada Helipad and Picnic Area Below Windsock Western Outer Circuit | Blue Diamond Hill, Nevada Vegas Strip and Beyond from Windsock Western Outer Circuit | Blue Diamond Hill, Nevada After Traversing Overlook Ridge, Now Descending into Skull Canyon Western Outer Circuit | Blue Diamond Hill, Nevada Descending Skull Canyon on the Bob Gnarly Trail Western Outer Circuit | Blue Diamond Hill, Nevada Bone Shaker Trail Ridge Above Cliffs to the West Western Outer Circuit | Blue Diamond Hill, Nevada Bomb Voyage/Muffin Trails Above Cliffs to the East Western Outer Circuit | Blue Diamond Hill, Nevada Continuing Descent Between Cliffs of Skull Canyon Western Outer Circuit | Blue Diamond Hill, Nevada View Back Up Skull Canyon Western Outer Circuit | Blue Diamond Hill, Nevada Skull Canyon Has Its Own Unique Beauty. Like Another World. Western Outer Circuit | Blue Diamond Hill, Nevada View of Red Rock Canyon and Beyond from Near Skull Canyon's Lower Opening. Western Outer Circuit | Blue Diamond Hill, Nevada View Back Up Skull Canyon. Bone Shaker Trail on Cliffs Above Western Outer Circuit | Blue Diamond Hill, Nevada Red Rock Canyon, Keystone Thrust Cliffs Background Through Lower Skull Canyon Western Outer Circuit | Blue Diamond Hill, Nevada Arrival at the Base of Skull Canyon. Angle Left Toward Trailhead. Western Outer Circuit | Blue Diamond Hill, Nevada View Back Up into Skull Canyon. Western Outer Circuit | Blue Diamond Hill, Nevada Blue Diamond Eastern Ridge from Near Trailhead Western Outer Circuit | Blue Diamond Hill, Nevada We've Been Waiting for You! Western Outer Circuit | Blue Diamond Hill, Nevada Every Horse Corral Needs a Burro Western Outer Circuit | Blue Diamond Hill, Nevada Final Goodbyes Blue Diamond Hill from Rainbow Mountains Upper Crest Ridgeline | Blue Diamond Hill | Red Rock Canyon, Nevada View East Toward Maverick Wind Sock Hill (Horizon) from Ridgeline's South High Point. | Western Outer Circuit | Blue Diamond Hill | Red Rock Canyon, Nevada Blue Diamond Hill from the Northwest Just Beyond the Trailhead | Western Outer Circuit | Blue Diamond Hill | Red Rock Canyon, Nevada Heading West Toward the Rainbow Mountains | Western Outer Circuit | Blue Diamond Hill | Red Rock Canyon, Nevada View South. Ridgeline on the Right is West of Blue Diamond Hill | Western Outer Circuit | Blue Diamond Hill | Red Rock Canyon, Nevada Ascended Here to the Center of the High Ridgeline West of Blue Diamond Hill | Western Outer Circuit | Blue Diamond Hill | Red Rock Canyon, Nevada Found a Nice Trail on the High Ridgeline West of Blue Diamond Hill. | Western Outer Circuit | Blue Diamond Hill | Red Rock Canyon, Nevada Rainbow Mt., Juniper Peak, Bridge Mt and White Rock Mt. in View. | Western Outer Circuit | Blue Diamond Hill | Red Rock Canyon, Nevada Slide #1 Was Taken from High Ridge Behind Rainbow Mt. (right). | Western Outer Circuit | Blue Diamond Hill | Red Rock Canyon, Nevada Mt. Wilson and Indecision Peak from Western High Ridge | Western Outer Circuit | Blue Diamond Hill | Red Rock Canyon, Nevada View Back to Red Rock Canyon from High Ridgeline West of Blue Diamond Hill | Western Outer Circuit | Blue Diamond Hill | Red Rock Canyon, Nevada Northern Rainbow Mountains & Red Rock Canyon from Western High Ridgeline | Western Outer Circuit | Blue Diamond Hill | Red Rock Canyon, Nevada Southern Rainbow Mts. to Potosi Mt. from High Ridgeline West of Blue Diamond Hill | Western Outer Circuit | Blue Diamond Hill | Red Rock Canyon, Nevada Mt. Wilson, Rainbow Mt., Bridge Mt. and White Rock Mt. from High Ridgeline | Western Outer Circuit | Blue Diamond Hill | Red Rock Canyon, Nevada Peace Symbol Throwback to the 60's May Have Been Created Back Then. | Western Outer Circuit | Blue Diamond Hill | Red Rock Canyon, Nevada Marker Placed on Ridgeline's South High Point Back in 1953. | Western Outer Circuit | Blue Diamond Hill | Red Rock Canyon, Nevada Descending the Western Ridgeline's Southern High Point | Western Outer Circuit | Blue Diamond Hill | Red Rock Canyon, Nevada Fossil Discoveries During the Ridgeline Descent | Western Outer Circuit | Blue Diamond Hill | Red Rock Canyon, Nevada Fossil Discoveries During the Ridgeline Descent | Western Outer Circuit | Blue Diamond Hill | Red Rock Canyon, Nevada Looks Like an Ancient Lake or Sea Bed | Western Outer Circuit | Blue Diamond Hill | Red Rock Canyon, Nevada More Fossil Shells | Western Outer Circuit | Blue Diamond Hill | Red Rock Canyon, Nevada Fossil Discoveries During the Ridgeline Descent | Western Outer Circuit | Blue Diamond Hill | Red Rock Canyon, Nevada Looking Back to the Western Ridgeline While Ascending Through Mining Operation | Western Outer Circuit | Blue Diamond Hill | Red Rock Canyon, Nevada Maverick Windsock Hill is High Point to Left of Mining Mound Ahead | Western Outer Circuit | Blue Diamond Hill | Red Rock Canyon, Nevada Closing In on Maverick Windsock Hill | Western Outer Circuit | Blue Diamond Hill | Red Rock Canyon, Nevada Ascending Toward the Wind Sock. Best 360-Degree View on Blue Diamond Hill East Ridge | Western Outer Circuit | Blue Diamond Hill | Red Rock Canyon, Nevada Arrival on Windsock Hill, Looking South | Western Outer Circuit | Blue Diamond Hill | Red Rock Canyon, Nevada View Toward Rainbow Mts. Mt. Charleston Wilderness Now in View. | Western Outer Circuit | Blue Diamond Hill | Red Rock Canyon, Nevada Zooming in on Mt. Charleston Wilderness. Griffith Peak (left) to Mummy Mt. (right) | Western Outer Circuit | Blue Diamond Hill | Red Rock Canyon, Nevada Helipad and Picnic Area Below Windsock | Western Outer Circuit | Blue Diamond Hill | Red Rock Canyon, Nevada Vegas Strip and Beyond from Windsock | Western Outer Circuit | Blue Diamond Hill | Red Rock Canyon, Nevada After Traversing Overlook Ridge, Now Descending into Skull Canyon | Western Outer Circuit | Blue Diamond Hill | Red Rock Canyon, Nevada Descending Skull Canyon on the Bob Gnarly Trail | Western Outer Circuit | Blue Diamond Hill | Red Rock Canyon, Nevada Bone Shaker Trail Ridge Above Cliffs to the West | Western Outer Circuit | Blue Diamond Hill | Red Rock Canyon, Nevada Bomb Voyage/Muffin Trails Above Cliffs to the East | Western Outer Circuit | Blue Diamond Hill | Red Rock Canyon, Nevada Continuing Descent Between Cliffs of Skull Canyon | Western Outer Circuit | Blue Diamond Hill | Red Rock Canyon, Nevada View Back Up Skull Canyon | Western Outer Circuit | Blue Diamond Hill | Red Rock Canyon, Nevada Skull Canyon Has Its Own Unique Beauty. Like Another World. | Western Outer Circuit | Blue Diamond Hill | Red Rock Canyon, Nevada View of Red Rock Canyon and Beyond from Skull Canyon's Lower Opening. | Western Outer Circuit | Blue Diamond Hill | Red Rock Canyon, Nevada View Back Up Skull Canyon. Bone Shaker Trail on Cliffs Above | Western Outer Circuit | Blue Diamond Hill | Red Rock Canyon, Nevada Red Rock Canyon, Keystone Thrust Cliffs Background Through Lower Skull Canyon | Western Outer Circuit | Blue Diamond Hill | Red Rock Canyon, Nevada Arrival at the Base of Skull Canyon. Angle Left Toward Trailhead. | Western Outer Circuit | Blue Diamond Hill | Red Rock Canyon, Nevada View Back Up into Skull Canyon. | Western Outer Circuit | Blue Diamond Hill | Red Rock Canyon, Nevada Blue Diamond Eastern Ridge from Near Trailhead | Western Outer Circuit | Blue Diamond Hill | Red Rock Canyon, Nevada We've Been Waiting for You! | Western Outer Circuit | Blue Diamond Hill | Red Rock Canyon, Nevada Every Horse Corral Needs a Burro | Western Outer Circuit | Blue Diamond Hill | Red Rock Canyon, Nevada Final Goodbyes | Western Outer Circuit | Blue Diamond Hill | Red Rock Canyon, Nevada

Overview | Western Outer Circuit | Blue Diamond Hill, Nevada

Slide show by 2/8/2023

Many Ways to Experience Blue Diamond Hill

Blue Diamond Hill is an amazing workout area with spectacular views of the Rainbow Mountains, Red Rock Canyon, La Madre Mountains Wilderness, Sheep Range, Gass Peak, the Las Vegas Valley and Strip and too many points beyond to name here. 

And, the variety of trail experiences ranges from hiking to running to mountain biking and equestrian adventures. The gradual inclines have made these trails a popular weekly or daily workout for many who have their favorite routes. There are even caves to explore on Blue Diamond Hill.

If you really want to get the most out of the extensive Blue Diamond Hill trail network, you might want to take time to systematically experience each unique route until you know them all. Then, you will be rewarded with an almost endless variety of mix-and-match trail experiences on this great hill. Your regular workouts on Blue Diamond Hill will never get old.

Why Start with an Outer Circuit Route of Blue Diamond Hill?

The network of trails on Blue Diamond Hill is rather complex and the trails are unmarked. There is a series of canyons and ridges that look fine on a map, but when you’re out there it’s often your best guess as to which trail you are actually on. You start on one trail, then there is an unmarked branch to the right, a little later another unmarked branch to the left. Each branch splits off again. I refer to this as a network of “Rabbit Trails”.

One great strategy to understand a network of unmarked “rabbit trails” is to begin with a wide perimeter outer circuit. During this circuit, notice where the canyons and ridges begin and end. Notice trails that branch off into canyon and ridge openings. 

After your outer circuit, study the map again in order to recognize the relationship of points on the map with sights you actually witnessed.

With Blue Diamond Hill it took me two attempts to make the original outer circuit. On the first exploration, the Eastern Outer Circuit (clockwise direction), I circled around too soon and ended up cutting through the middle of Blue Diamond Hill, missing the Western region. So, on this second exploration I reversed the direction (counterclockwise) and successfully made a complete wide circuit of Blue Diamond Hill. This “reverse maneuver” has helped me navigate much more difficult wilderness areas.

With each circuit I began to recognize more reference points, and now am ready to tackle the ridges and canyons of Blue Diamond Hill.   

Best Time of Year to Be on Blue Diamond Hill

Stick to Mid-Fall through Mid-Spring. You may experience some snow during the Winter months, so be prepared. However, the snow melts quickly and doesn’t tend to linger on Blue Diamond Hill. Summer temperatures can easily exceed 110 degrees. Visit higher elevations in the Summer, like The Mt. Charleston Wilderness. 

Trailhead Directions | Western Outer Circuit | Blue Diamond Hill, Nevada

Take the Charleston exit off Hwy 215 in Las Vegas. Head up toward the mountains (Red Rock Canyon). You’ll pass Calico Basin and then the Red Rock Canyon entrance. Just a bit beyond that watch for the Cowboy Trail Rides on the left.

Park in the Fossil Canyon Trailhead area on the South (left) side of Highway 159 outside the Cowboy Trail Rides operation.

Adventure Description | Western Outer Circuit | Blue Diamond Hill, Nevada

Fossil Canyon Trailhead to the Unpaved Jeep Road

Starting at the Fossil Canyon Trailhead parking area, head West (toward the Rainbow Mountains) staying as close to Highway 159 as possible. Eventually, you’ll meet up with an unpaved road. Take a left (South) on the unpaved road. Notice a couple high ridges to your right (West) between the road you are on and the Rainbow Mountains.

Traversing the High Western Ridgeline

When you see a few human made gouges in the ridge on your right (the purpose of these gouges is unclear), ascend the ridge to its summit. There you will find a great trail that will take you along the ridge to its high Southern point. I love traversing ridges because the views are at their best. There are great views of Blue Diamond Hill to your left (East), the Rainbow Mountains to your right (West) and continually expanding views of Red Rock Canyon behind you (North).

Scoping Out Your Route to the Maverick Helicopters Windsock Hill

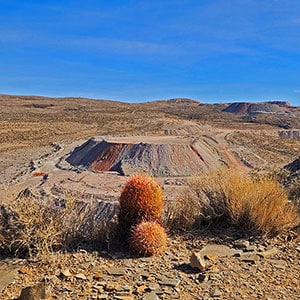
At the high South point on the ridge, notice a couple radio towers on Blue Diamond Hill to the West and a series of huge mining mounds in the Gypsum Resources Mining operation below and just South (to the right) of the radio towers. You want to chart a course West to the right of the radio towers and hugging the edge of the mining area. This will bring you to the highest point on Blue Diamond Hill: The Maverick Helicopters windsock hill on the Eastern ridgeline of Blue Diamond Hill. This is your point of reference. Roads and trails will weave in and out. Just keep a steady approach toward the Maverick Helicopters windsock hill (see the video and slides on this page for reference).

Descending from the Western Ridge Highpoint

Your first challenge is to descend the Western Ridge highpoint. The descent slope is steep with loose rocks and boulders and a series of 6-10ft ledges to navigate. It’s just difficult enough to be fun and is not dangerous as long as you securely plant every step and don’t put your full weight on any rock or boulder. A cool reward is finding rocks and boulders embedded with ancient fossils on this descent route that is rarely traversed that therefore undisturbed.

Western Ridge Base to Maverick Helicopters Windsock Hill

Once at the base of the Western ridge, you’ll reconnect with the unpaved road system that will wind along the North edge of the Gypsum Mining area. Keep your focus on the far Eastern high ridge to the right (South) of the radio towers as you reach the upper end of the mining hills.

At the upper end of the mining hills, find a ridge that will continue upward toward the Maverick Helicopters windsock hill, which is becoming more prominent at this point. On this ridge, you’ll eventually come across a trail as you continue to ascend. 

Just before the windsock hill, you’ll descend through a small canyon and then re-ascend straight for the windsock hill. By now you may be able to actually see the windsock.

When you reach the windsock, you are at the best 360-degree view on Blue Diamond Hill. In addition to the reference points mentioned above, you can now see Griffith Peak and Mummy Mountain in the Mt. Charleston Wilderness to the Northwest!

Windsock Hill to Skull Canyon

The rest of this circuit is all on good trails. Take a left (North) from windsock hill toward the upper radio tower. You’re now on the Overlook Ridge Trail. Continue on Overlook Ridge past the radio tower enjoying non-stop views! Eventually the trail takes a left (West) through a small canyon toward the next ridge to the West. 

When you reach the edge of the next ridge, you have a choice:

  1. You could take a right along that high ridge, finding yourself on the Bomb Voyage/Muffin trails that will eventually take you back to the Fossil Canyon Trailhead.
  2. You could continue heading West beyond that ridge, then angling downward to the right (North) to descend through Skull Canyon on the Bob Gnarly Trail. This will also take you back to the Fossil Canyon Trailhead. 

Descending Through Skull Canyon on the Bob Gnarly Trail

The Bob Gnarly Trail winds downward through Skull Canyon. You’ll begin on one of two upper branches of Skull Canyon. Both branches soon converge in the upper part of Skull Canyon. As you wind downward through Skull Canyon there are spectacular towering cliffs on each side. To your left (West) is the high ridge of the Bone Shaker Trail. To your right (East) is the high ridge of the Bomb Voyage/Muffin Trails. It’s like another world in that canyon, which has its own beauty. The trail is very good.

Exiting Skull Canyon

As you near the lower opening of Skull Canyon you’ll meet up with the Bomb Voyage/Muffin Trails that have been winding downward from the high ridge to your right (East). Continue downward to the base of Skull Canyon and angle left to the equestrian corral and your starting point at the Fossil Canyon Trailhead parking area. Congratulations! You’ve completed a huge Western circuit of Blue Diamond Hill!  
Summary
Western Outer Circuit | Blue Diamond Hill, Nevada
Article Name
Western Outer Circuit | Blue Diamond Hill, Nevada
Description
This is a circuit of the Western region of Blue Diamond Hill in Red Rock Canyon National Conservation Area, Nevada. The adventure starts at the Fossil Canyon Trailhead and takes a large counterclockwise circuit around Blue Diamond Hill. There are 2 high points on this route with exceptional views and the finish stretch through a beautiful canyon.
Author
Publisher Name
LasVegasAreaTrails.com
Publisher Logo
Translate »